Owner & setup
Owner setup
Clinic profile, billing rules, receipt and lab report layout, branches, users and roles, services and prices, packages and the audit log
Who it is for:OwnerManager
On this page
Before the first working day the owner sets up a few things once: the clinic's name and address, branches, staff accounts and service prices. This chapter walks through each of them. Doctors and chamber schedules are in Doctors; online payments, the licence and AI assistants are in Payments, licence & AI.
First-day checklist
- In Settings, fill in the clinic profile, billing, receipt and lab report rules (below).
- If you have more than one branch, add them in Branches (below).
- Add doctors and their chambers in Doctors & referrers (Doctors).
- Create an account for every staff member in Users & roles (below).
- Check test and service prices in Services & prices (below).
- Set up test parameters and reference ranges (Laboratory).
Clinic profile and settings
Open Admin › Settings in the sidebar.
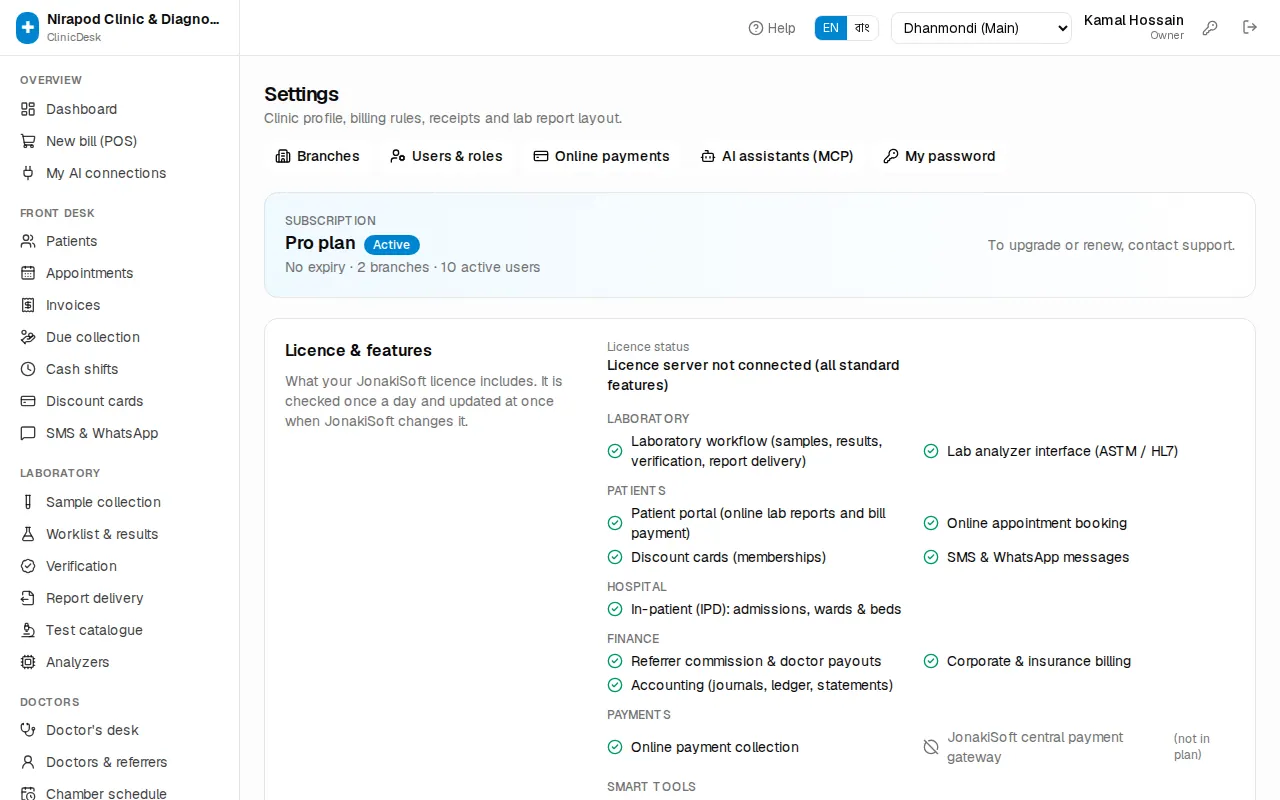
The Subscription box at the top shows your plan, expiry date, number of branches and active users. Below it is the Licence & features box (see Payments, licence & AI). The buttons at the top open Branches, Users & roles, Online payments, AI assistants (MCP) and My password.
Clinic profile
This is printed on bills, money receipts and lab reports.
- Fill in Clinic / hospital name, Phone, Email and Address.
- If you have them, add the DGHS licence no. and VAT registration (BIN).
- Press Save profile.
The other settings
The boxes below are saved together: change what you need, then press Save settings at the very bottom of the page.
- Language › Default language: what new staff see first. Each person can still choose their own.
- Billing:
- VAT (%) — 0 if your services are VAT-exempt.
- Receptionist discount cap (%) — reception cannot give more discount than this. Managers can go above it.
- Default referral commission (%) — used when neither the doctor nor the test has its own rate.
- Follow-up window (days) — a patient who comes back to the same doctor within this many days pays the follow-up fee.
- Round bills to whole Taka — drops the paisa so bills are in whole taka.
- Receipts: Paper size (80 mm thermal or A4 / half A4), a Header line (for example your hotline number) and a Footer note.
- Lab reports:
- Report header and Report footer.
- Print letterhead — turn it off if you print on pre-printed pads; a blank top margin is left instead.
- Pathologist verification required — results can't be printed or delivered until verified.
- Full payment before delivery — report delivery is blocked while the bill has due.
- Online report portal — patients download verified reports themselves with bill no. + PIN (Patient portal).
- Online appointment booking: Allow online booking and Days ahead patients can book. The booking address (
/book/...) is shown in this box. - SMS & WhatsApp: the link here opens Settings → Integrations (SMS & WhatsApp).
Branches
Open Admin › Branches. Each branch has its own bills, cash shifts, samples, appointments and wards; patients and doctors are shared.
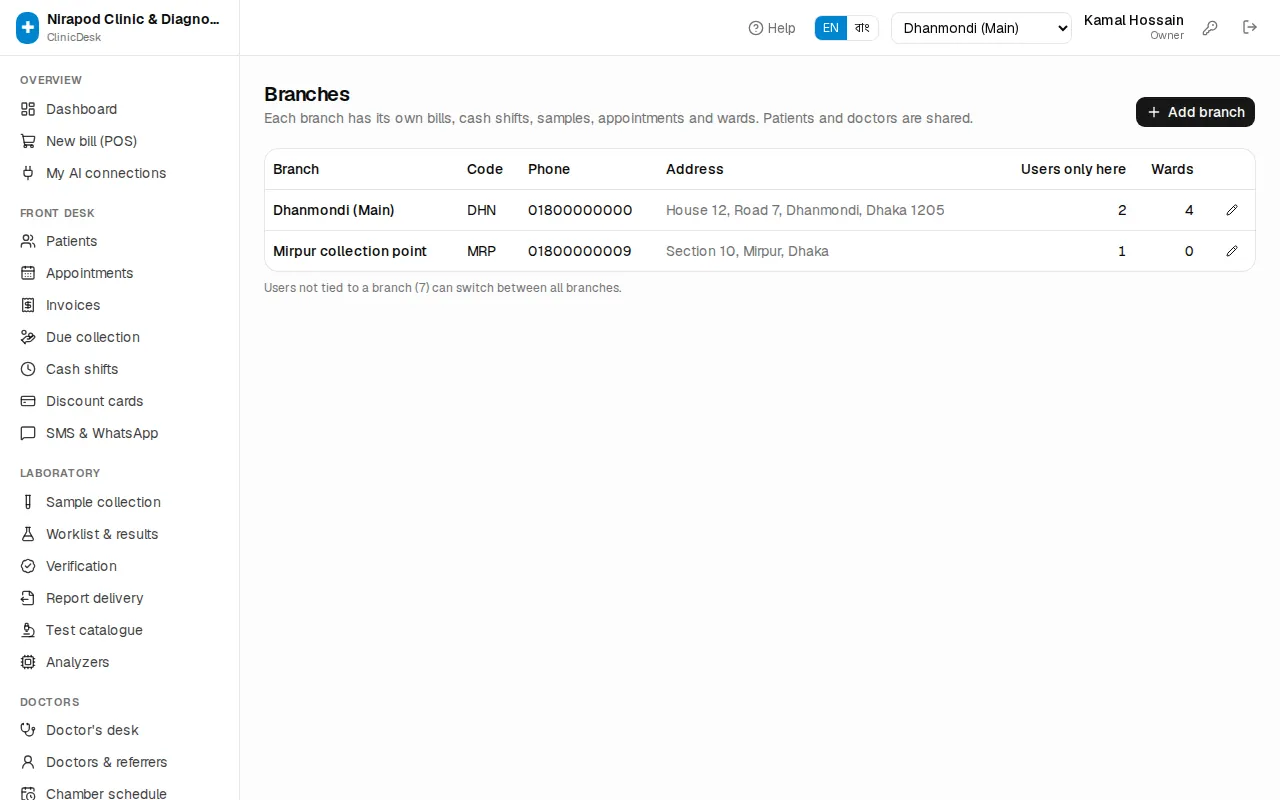
To add a branch:
- Press Add branch.
- Type the Branch name and a Code of 2–6 letters, for example
DHN. - Add the Phone and Address.
- Press Save. You see "Branch created".
Edit a branch with the pencil icon on its row. When a branch closes, untick Active: closed branches disappear from the branch switcher but their history stays. The Users only here column counts the staff tied to that branch.
Users and roles
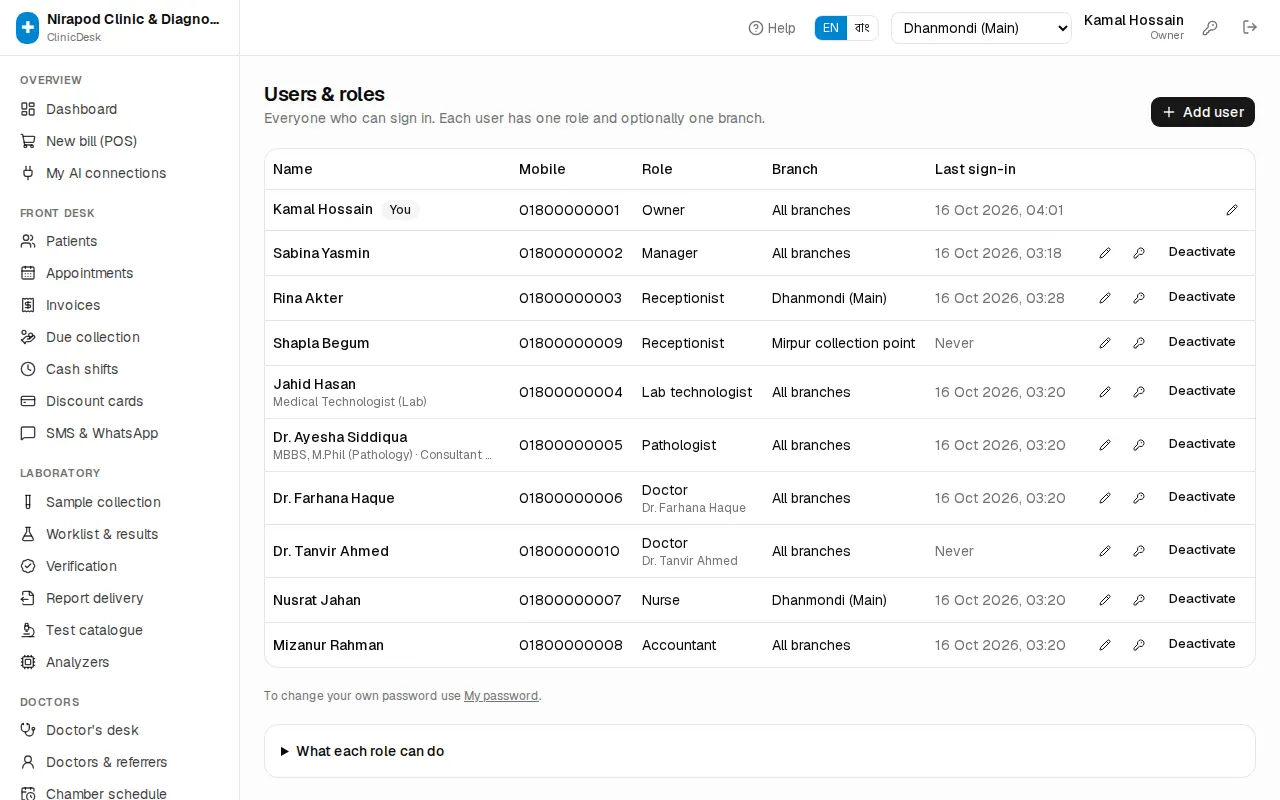
Open Admin › Users & roles. Everyone who can sign in is listed here.
Adding a staff member
- Press Add user.
- Type the Full name and Mobile (login) — the number they sign in with.
- Choose the Role (Receptionist, Lab technologist, Doctor …).
- Branch: pick one to keep them in that branch only; leave it on All branches to let them switch between all branches.
- Language: leave blank to use the clinic default.
- For a doctor, choose their name in Doctor profile (Doctor role only) so the doctor's desk shows their own patients.
- For pathologists and technologists, fill in Designation / signature lines, one line per row. They are printed under the signature on lab reports.
- Give a Password of at least 6 characters and share it with the person privately.
- Press Save. You see "User created".
Managing accounts
Each row has three actions on the right:
- Pencil — change name, role, branch or language.
- Key — set a new password for someone who forgot theirs. After Set password that person is signed out everywhere.
- Deactivate — when someone leaves. They are signed out at once and cannot sign in again; everything they did stays on record. Activate brings them back.
Last sign-in shows when each person last signed in. You cannot change your own password here — use My password.
Open What each role can do at the bottom of the page to see the full table of permissions per role.
Services and prices
Open Admin › Services & prices. Everything that can be billed is here: tests, imaging, consultations, procedures, beds and packages.
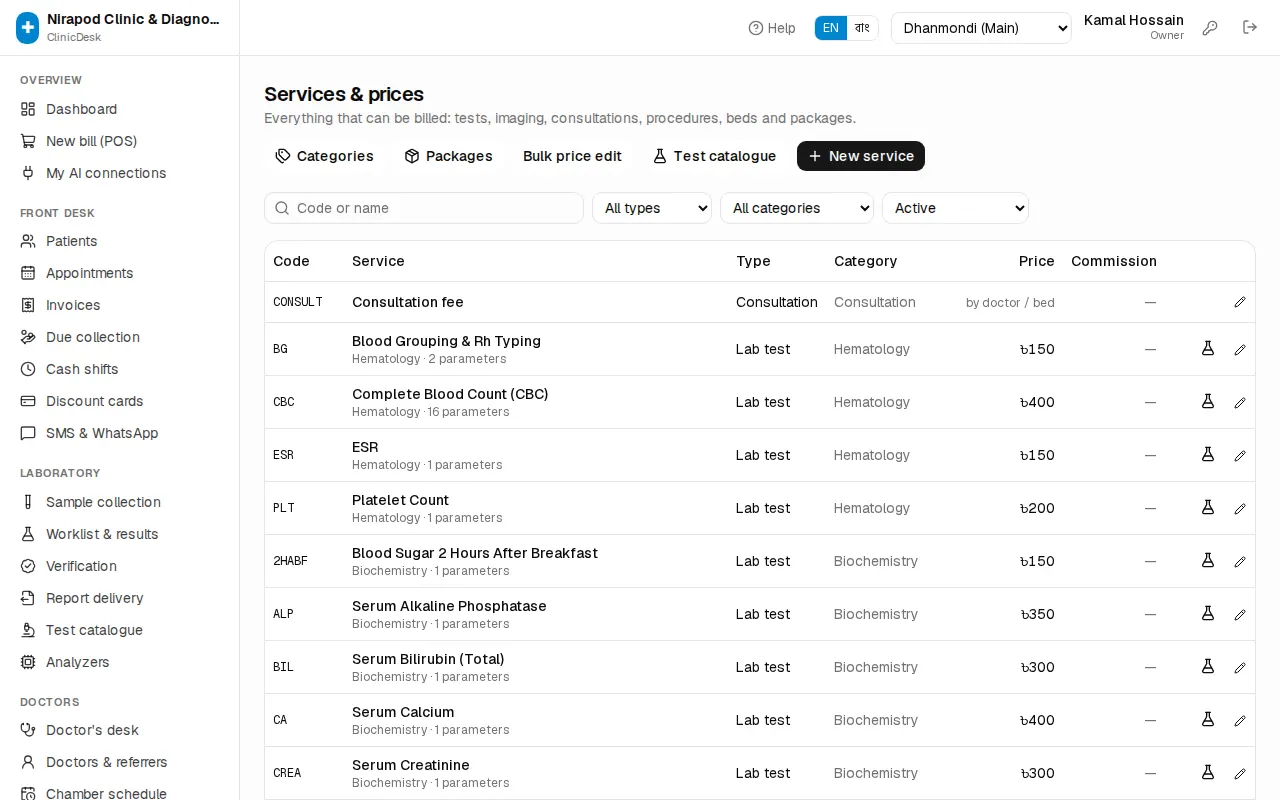
Search by code or name, and narrow the list with All types, All categories and Active.
A new service
- Press New service.
- Type a Code (for example
CBC) — the counter finds the service by typing it — and the Name. - Choose the Type (Consultation, Lab test, Imaging, Package, Procedure, Bed / ward, Medicine or Other) and the Category.
- Enter the Price (৳). For a consultation or bed, 0 means the price is taken from the doctor's fee or the bed rate.
- Leave Referral commission (%) blank to use the referring doctor's rate or the clinic default.
- For a lab test or imaging, type the Lab department (for example Biochemistry).
- Press Save.
Parameters, ranges and the report template of lab tests are set up in Test catalogue (Laboratory). A test showing "no parameters yet" cannot have results entered.
To stop offering a service, open it with the pencil and untick Active. Inactive services can't be billed but stay on old bills.
Categories
Open Service categories at the bottom of the page. Categories group services on bills and reports; the Order number sets how they are listed. Type a new category name and press Add. Only a category with no services can be deleted.
Bulk price edit
To change many prices at once — say, everything up 10% at the start of the year — use Bulk price edit.
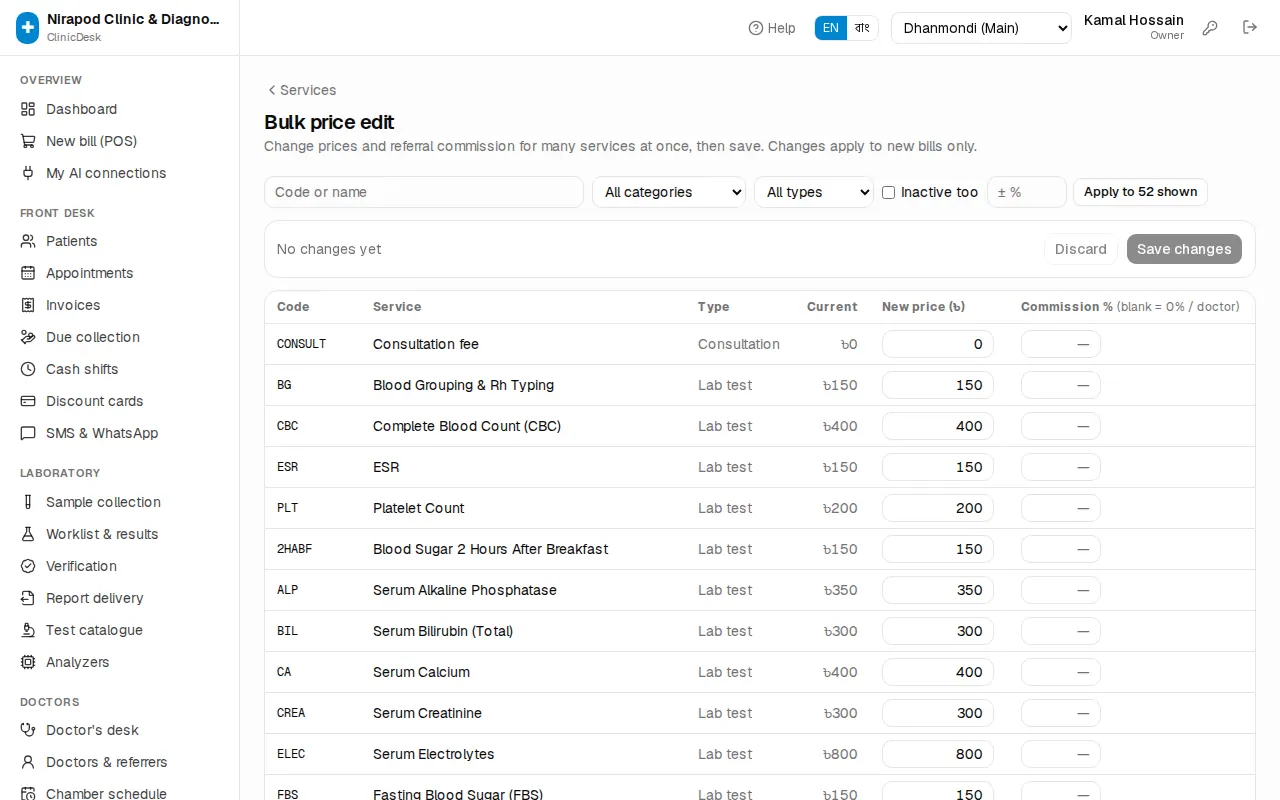
- Narrow the list by category or type.
- Type a New price (৳) and Commission % straight into the rows, or type a percent in the ± % box (for example
10or-5) and press Apply to N shown. - The bar shows how many changes you have made. Discard throws them away.
- Press Save changes.
Changes apply to new bills only; old bills keep their prices.
Health packages
Packages sell several tests at one price, for example a Diabetes profile or a Pre-employment medical. The lab gets every included test as its own order.
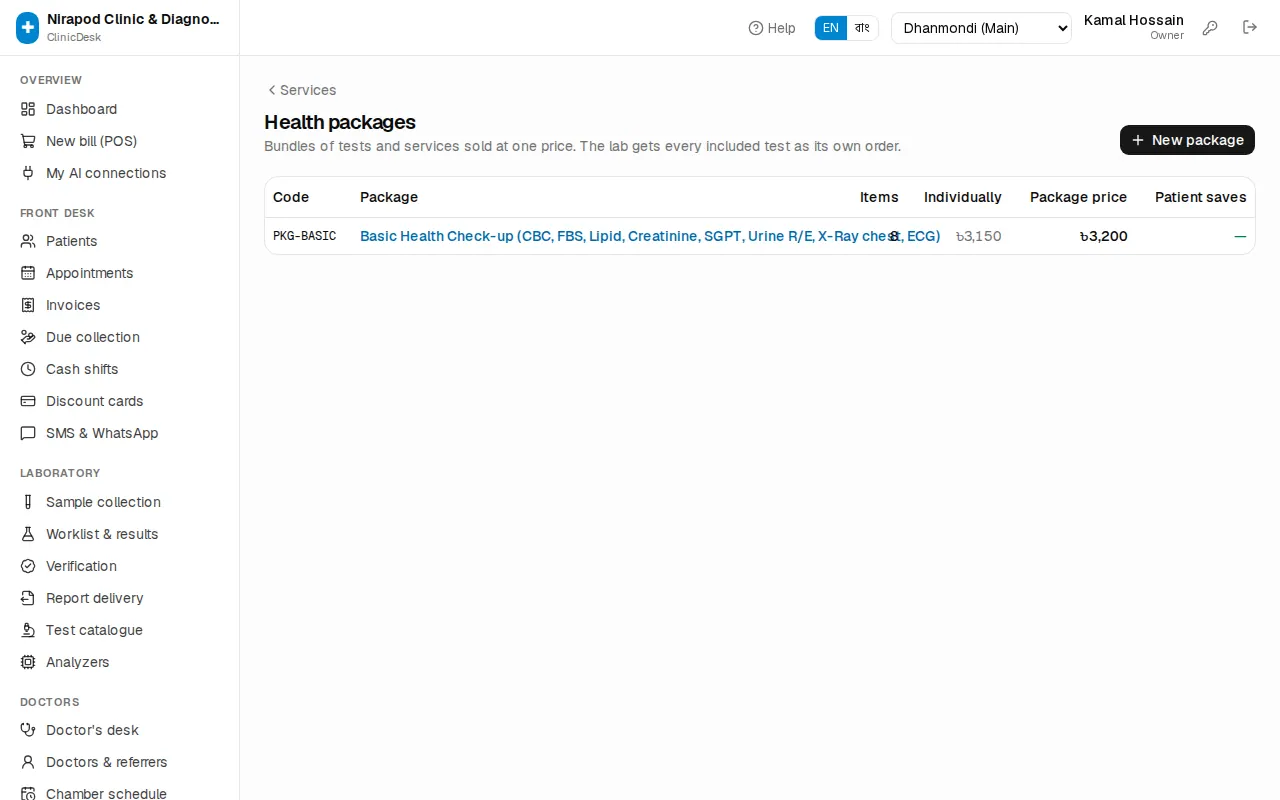
- On Services & prices, press Packages, then New package.
- Give it a code and name and save. You see "Package created — now choose what it includes".
- On the package page, type test codes or names in the search box and add them one by one.
- Enter the Package price (৳). Next to it you see what the tests cost individually and how much the Patient saves.
- Press Save package.
Audit log
Open Admin › Audit log. It records who did what and when: bills, cancellations, refunds, verifications, prices, settings, users and more.
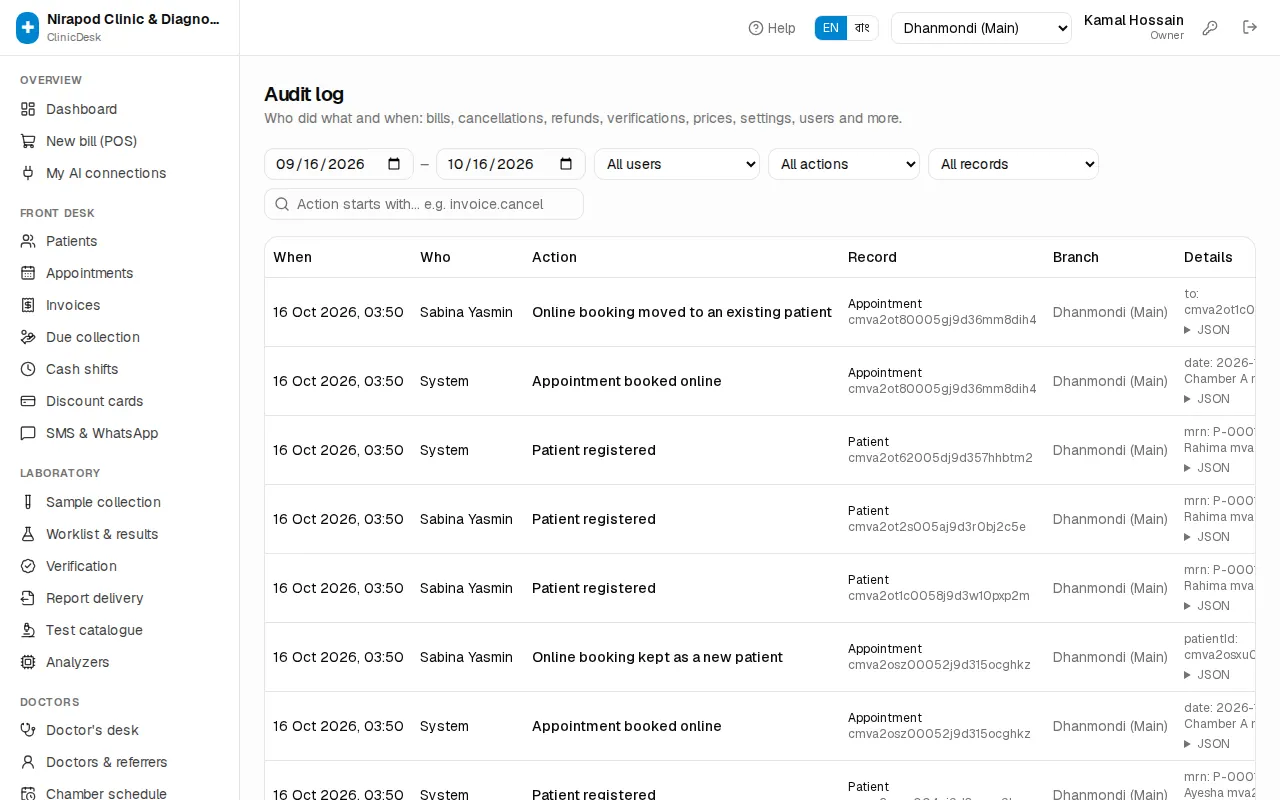
- Filter by date, All users, All actions and All records.
- Type the start of an action in the search box, for example
invoice.cancel. - Click a number in the Record column to see all activity on that bill or patient.
- The Details column shows the value of each field before and after.